Example: Deploying WordPress and MySQL with Persistent Volumes
This tutorial shows you how to deploy a WordPress site and a MySQL database using Minikube. Both applications use PersistentVolumes and PersistentVolumeClaims to store data.
A PersistentVolume (PV) is a piece of storage in the cluster that has been manually provisioned by an administrator, or dynamically provisioned by Kubernetes using a StorageClass. A PersistentVolumeClaim (PVC) is a request for storage by a user that can be fulfilled by a PV. PersistentVolumes and PersistentVolumeClaims are independent from Pod lifecycles and preserve data through restarting, rescheduling, and even deleting Pods.
Warning: This deployment is not suitable for production use cases, as it uses single instance WordPress and MySQL Pods. Consider using WordPress Helm Chart to deploy WordPress in production.
Note: The files provided in this tutorial are using GA Deployment APIs and are specific to kubernetes version 1.9 and later. If you wish to use this tutorial with an earlier version of Kubernetes, please update the API version appropriately, or reference earlier versions of this tutorial.
- Objectives
- Before you begin
- Create PersistentVolumeClaims and PersistentVolumes
- Create a kustomization.yaml
- Add resource configs for MySQL and WordPress
- Apply and Verify
- Cleaning up
- What's next
Objectives
- Create PersistentVolumeClaims and PersistentVolumes
- Create a
kustomization.yamlwith- a Secret generator
- MySQL resource configs
- WordPress resource configs
- Apply the kustomization directory by
kubectl apply -k ./ - Clean up
Before you begin
You need to have a Kubernetes cluster, and the kubectl command-line tool must be configured to communicate with your cluster. If you do not already have a cluster, you can create one by using Minikube, or you can use one of these Kubernetes playgrounds:
To check the version, enter kubectl version.
The example shown on this page works with kubectl 1.14 and above.
Download the following configuration files:
Create PersistentVolumeClaims and PersistentVolumes
MySQL and Wordpress each require a PersistentVolume to store data. Their PersistentVolumeClaims will be created at the deployment step.
Many cluster environments have a default StorageClass installed. When a StorageClass is not specified in the PersistentVolumeClaim, the cluster’s default StorageClass is used instead.
When a PersistentVolumeClaim is created, a PersistentVolume is dynamically provisioned based on the StorageClass configuration.
Warning: In local clusters, the default StorageClass uses thehostPathprovisioner.hostPathvolumes are only suitable for development and testing. WithhostPathvolumes, your data lives in/tmpon the node the Pod is scheduled onto and does not move between nodes. If a Pod dies and gets scheduled to another node in the cluster, or the node is rebooted, the data is lost.
Note: If you are bringing up a cluster that needs to use thehostPathprovisioner, the--enable-hostpath-provisionerflag must be set in thecontroller-managercomponent.
Note: If you have a Kubernetes cluster running on Google Kubernetes Engine, please follow this guide.
Create a kustomization.yaml
Add a Secret generator
A Secret is an object that stores a piece of sensitive data like a password or key. Since 1.14, kubectl supports the management of Kubernetes objects using a kustomization file. You can create a Secret by generators in kustomization.yaml.
Add a Secret generator in kustomization.yaml from the following command. You will need to replace YOUR_PASSWORD with the password you want to use.
cat <<EOF >./kustomization.yaml
secretGenerator:
- name: mysql-pass
  literals:
  - password=YOUR_PASSWORD
EOF
Add resource configs for MySQL and WordPress
The following manifest describes a single-instance MySQL Deployment. The MySQL container mounts the PersistentVolume at /var/lib/mysql. The MYSQL_ROOT_PASSWORD environment variable sets the database password from the Secret.
application/wordpress/mysql-deployment.yaml

|
|---|
|
Download the MySQL deployment configuration file.
curl -LO https://k8s.io/examples/application/wordpress/mysql-deployment.yamlDownload the WordPress configuration file.
curl -LO https://k8s.io/examples/application/wordpress/wordpress-deployment.yamlAdd them to
kustomization.yamlfile.cat <<EOF >>./kustomization.yaml resources: - mysql-deployment.yaml - wordpress-deployment.yaml EOF
Apply and Verify
The kustomization.yaml contains all the resources for deploying a WordPress site and a
MySQL database. You can apply the directory by
kubectl apply -k ./Now you can verify that all objects exist.
Verify that the Secret exists by running the following command:
kubectl get secretsThe response should be like this:
  NAME                    TYPE                                  DATA   AGE
  mysql-pass-c57bb4t7mf   Opaque                                1      9s
Verify that a PersistentVolume got dynamically provisioned.
kubectl get pvcNote:It can take up to a few minutes for the PVs to be provisioned and bound.The response should be like this:
  NAME             STATUS    VOLUME                                     CAPACITY   ACCESS MODES   STORAGECLASS       AGE
  mysql-pv-claim   Bound     pvc-8cbd7b2e-4044-11e9-b2bb-42010a800002   20Gi       RWO            standard           77s
  wp-pv-claim      Bound     pvc-8cd0df54-4044-11e9-b2bb-42010a800002   20Gi       RWO            standard           77s
Verify that the Pod is running by running the following command:
kubectl get podsNote:It can take up to a few minutes for the Pod’s Status to beRUNNING.The response should be like this:
  NAME                               READY     STATUS    RESTARTS   AGE
  wordpress-mysql-1894417608-x5dzt   1/1       Running   0          40s
Verify that the Service is running by running the following command:
kubectl get services wordpressThe response should be like this:
NAME TYPE CLUSTER-IP EXTERNAL-IP PORT(S) AGE wordpress ClusterIP 10.0.0.89 <pending> 80:32406/TCP 4mNote:Minikube can only expose Services throughNodePort. The EXTERNAL-IP is always pending.Run the following command to get the IP Address for the WordPress Service:
minikube service wordpress --urlThe response should be like this:
http://1.2.3.4:32406Copy the IP address, and load the page in your browser to view your site.
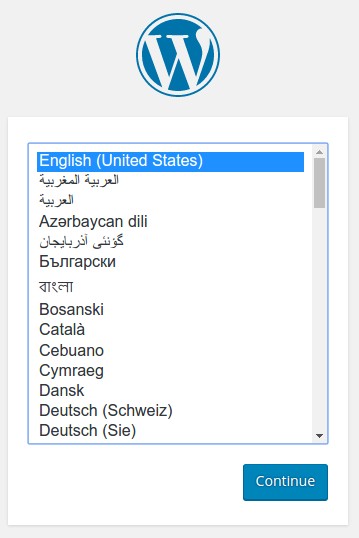
You should see the WordPress set up page similar to the following screenshot.
Warning: Do not leave your WordPress installation on this page. If another user finds it, they can set up a website on your instance and use it to serve malicious content.
Either install WordPress by creating a username and password or delete your instance.
Cleaning up
Run the following command to delete your Secret, Deployments, Services and PersistentVolumeClaims:
kubectl delete -k ./
What's next
- Learn more about Introspection and Debugging
- Learn more about Jobs
- Learn more about Port Forwarding
- Learn how to Get a Shell to a Container
Feedback
Was this page helpful?
Thanks for the feedback. If you have a specific, answerable question about how to use Kubernetes, ask it on Stack Overflow. Open an issue in the GitHub repo if you want to report a problem or suggest an improvement.